
Tear Out Notes
What twenty years of grout lines were actually hiding.
Published
Integrated Sinks in Custom Countertops: How a Fabricated Basin Is Built
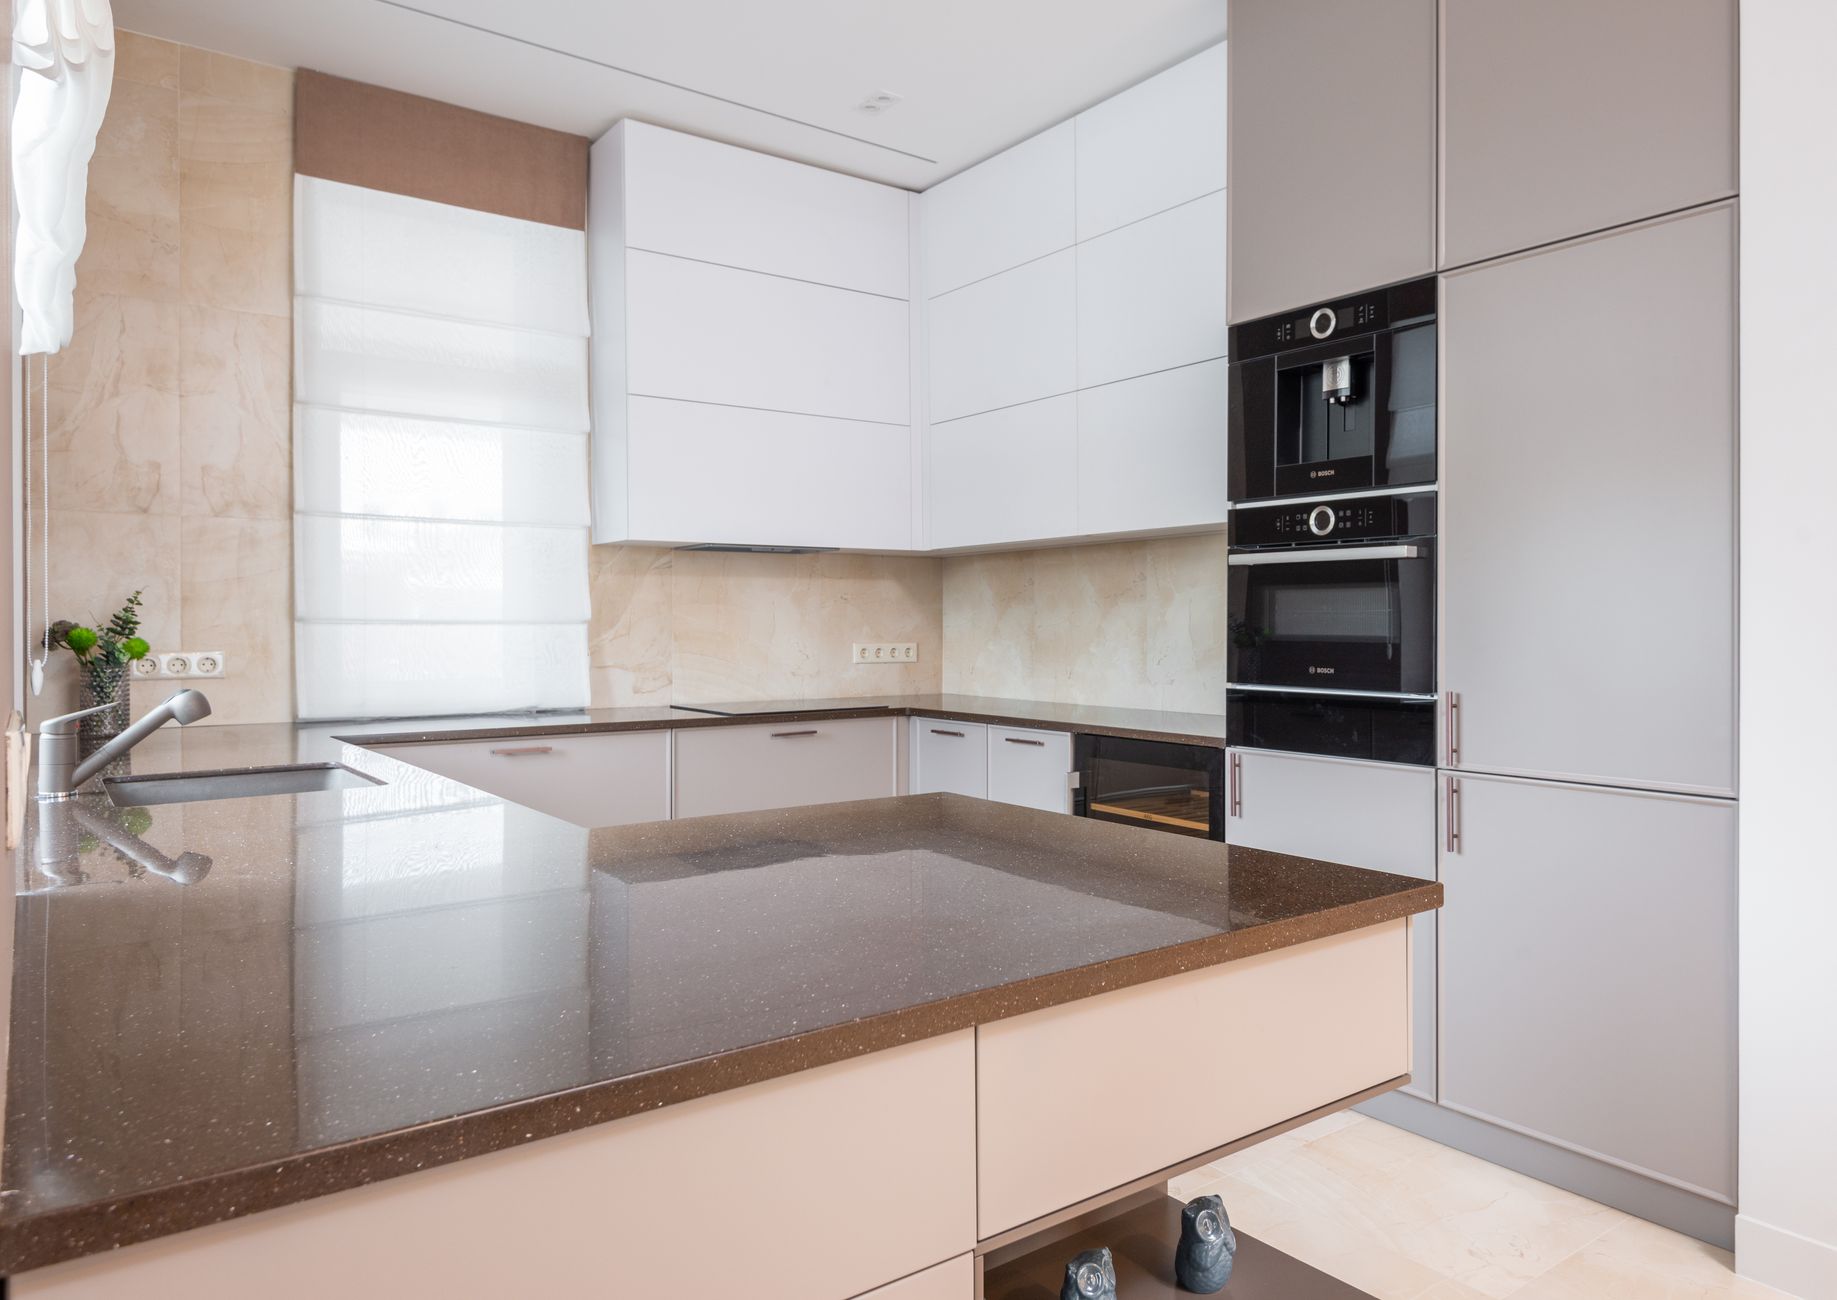
The sink is the hardest working square foot in any kitchen. It is wet for hours a day, it takes every hot pan and every dropped glass in the house, and it is the one place where a countertop stops being a surface and starts being a container.
The usual arrangement is an undermount bowl. A stainless, fireclay or composite sink is hung beneath the stone on clips and adhesive, and the machined edge of the cutout becomes the rim of the opening. It works, it has worked for decades, and it carries one permanent feature that nobody chooses and everybody lives with. There is a joint, a thin line of sealant running the whole way around the bowl where two different materials meet, and that line is the part of a kitchen that ages fastest.
An integrated sink is an attempt to delete that line. Instead of buying a bowl and hanging it, the fabricator builds one from the same material as the counter, so the deck, the rim and the inside of the basin are a single continuous surface in a single colour. It can be made from granite, quartzite, engineered quartz, solid surface or a porcelain slab, and that choice changes nearly everything about how it is built and how it behaves in year five. These are trade notes on how the box is made, why the bottom cannot be flat, where it chips, and what can honestly be repaired.
Two unrelated products are sold under one word
Establish which of the two you are being quoted, because the word covers both.
A fabricated box. Five pieces of your countertop material are cut, mitred and bonded into an open topped box, which is then bonded under the deck. This is the one that exists in stone, quartz and porcelain, and it is what the rest of this article is about.
A moulded bowl in solid surface. Acrylic solid surface can be thermoformed and then seamed with the same material, so the joint is chemically identical to the parts either side of it. When people say seamless and mean it literally, this is the material they mean.
The distinction decides what happens when something goes wrong. A moulded solid surface bowl can be sanded and refinished by hand almost indefinitely. A fabricated stone box cannot.
How a fabricated box is actually made
The box is five pieces: four walls and a base. Each wall meets the base and its neighbours on a forty five degree mitre, so at every corner the finished face runs right to the outside of the joint and no cut edge is looking at you. On a printed or glazed material that mitre is not a preference, it is the only way to keep the pattern on the inside of the bowl instead of a band of unrelated body colour.
Those cuts have to be exact along their whole length. A mitre that drifts half a degree over eighteen inches leaves a corner tight at one end and open at the other, and unlike a mitre on the end of an island, this one is going to be full of water.
The pieces are assembled in a jig, closed over a bead of colour matched adhesive and clamped until cured. Better shops rout a groove into the mating faces first and bed a reinforcing rod across the joint, particularly along the base joints, which carry a full basin plus whatever is soaking in it. The interior is then polished through the same grit sequence as the face.
The box is bonded under the deck around the opening last. Nothing moves until that adhesive is hard, which is why an integrated sink adds days to a fabrication schedule rather than hours.
The inside corners, and the argument about coving
A hard mitred corner inside a basin is a sharp internal angle, and it is where grease, coffee grounds and limescale collect while a cloth glides past. Many shops run a small cove into the internal corners and the base joints after assembly. A crisp corner photographs better and cleans worse. Ask which you are getting.
The bottom cannot be flat, and this is where most of them fail
This is the detail that separates an integrated sink that is a pleasure from one that is a daily annoyance, and it is almost never raised in a showroom.
A manufactured stainless bowl arrives with its floor pressed into a gentle fall toward the drain, and you never notice, because you have never seen it not work. A fabricated box is built from flat panels, and a flat panel stays flat unless somebody deliberately makes it otherwise. Build a box on a level base and after every wash you are left with a film of standing water that drains by evaporation rather than by gravity.
In a region with water this hard, that film is not just a puddle. It is a thin layer of dissolved mineral drying in place every single day, so the basin floor develops a dull haze sitting on top of the finish. On engineered quartz it takes a deliberate descaling to shift, and the acids that shift it fastest are the ones you should not be putting on a resin bound surface.
There are three honest ways to give the base a fall, and a shop should be able to name the one it uses.
Mill the base. On thicker material the base panel is machined so it thins toward the drain, giving a continuous fall in the finished floor. The cleanest result and the most machine time, and it is unavailable in thin material, because on a twelve millimetre panel there is nothing to remove.
Set the base on a tilt. The panel is bonded at a slight angle to the horizontal with the mitres cut to suit. It works well, and it has to be planned before anything is cut, because every wall height changes.
Use a ramp. The base is built as a plane falling from the front of the basin toward the back, where the drain sits in the lowest corner or feeds a channel along the back wall. A slot drain is the tidiest version: a narrow linear opening at the rear, with the whole floor sloping to it, so there is no round flange in the middle of the bowl to work around. Slot drains want a specific drain assembly, so the plumbing is settled at the same moment as the fabrication.
The fall involved is small, on the order of an eighth of an inch across the basin, sometimes a quarter. You cannot see it. You find out whether it is there by running the tap, shutting it off and coming back two minutes later.
Joints, adhesive and the thing that is always wet
Every joint in this box spends part of every day underwater and the rest of it damp, which is a harder service condition than any other joint in the kitchen.
Colour matched polyester cures fast and sands beautifully, which is why shops like it for seams and edges. Epoxies are slower and hold up better against constant moisture and the pH swings of detergent and descaler, so for a sink box the extra cure time is worth it.
The joint has to be filled, not merely closed. A tight dry joint with a whisker of adhesive in it wicks water into the gap, and a failing one gives warning in order: a fine dark line appears along a base corner, the line widens, then the cabinet floor underneath shows a damp patch. If you see the dark line, the sink is telling you something while it is still cheap to hear.
Silicone has no structural role inside a well made box. A shop proposing a bead of it along the internal corners as the waterproofing is building a tiled shower, not a sink, and that bead will discolour on exactly the schedule the undermount joint would have.
The rim, chipping, and what can honestly be repaired
The rim is the top edge of the basin wall where it meets the opening in the deck, and on a mitred box it starts life as a feathered arris of brittle material. Left sharp it is a chip waiting for its first cast iron pan. Every competent shop takes a small ease off it, barely visible and clearly felt with a fingertip, and on thin material you should ask for it by name.
When a chip happens, repairability is decided entirely by the material. Granite and quartzite take a tinted resin fill, dressed back and polished, and on a busy pattern the result is hard to find. Engineered quartz repairs acceptably on a patterned colour and poorly on a plain one, because a solid white basin shows a filled chip as a slightly different white forever. Porcelain is the hardest case: if the sheet is glazed rather than through body, a chip exposes a body of unrelated colour, and no filler reproduces a printed vein convincingly.
What cannot be repaired in place, in any material, is a crack that has started at an internal corner and run, or a base joint that has genuinely let go. Sometimes a base can be re-bonded from beneath if the cabinet gives access. Often the honest answer is that the basin is part of the counter piece, and replacing it means replacing that piece, with a new seam where there was not one before. That asymmetry is the real cost of the detail.
Against an undermount steel bowl, in daily use
Steel wins on several counts and it is not close. It costs a fraction as much, it is effectively immune to chipping, and it is kinder to dropped glassware because the panel flexes where a stone basin does not. And when a steel bowl is finally ruined it is a component: it comes out and a new one goes in without touching the stone.
The integrated box wins on the one thing it was built to win on. No bead of sealant at the deck, no clip line, no lip, no material transition, so water and crumbs sweep straight off the counter into the basin with nothing to catch on. The sensible compromise is to put it where appearance matters and abuse does not, a bar sink, a vanity, an island prep bowl, and to put a deep stainless bowl with proper support under it where the pans and the evening washing up actually happen.
One footnote that catches people out. A fabricated basin has no threaded boss for the drain, so the flange seats directly on the material, and plumber’s putty will stain porous natural stone around the opening. A neutral cure silicone is the correct bedding, and the drain assembly wants settling with the plumber before the box is built.
Before you commit, ask to see one the shop has built, fill it, pull the plug and stand there for two minutes. Where the water goes, and what is left behind when it has gone, tells you more about that fabricator than any photograph will.
Published
What Is Actually Under a Riverside Tile Countertop
Every countertop estimate in this city runs into the same wall. A homeowner wants a firm number, we want to give one, and between us sits half an inch of ceramic tile that neither of us can see through.
The Assembly Nobody Thinks About
People treat a tile counter as a surface. It is not. It is a stack of layers, and only the top one is visible.
Start from the tile and work down. Ceramic or porcelain tile, then a setting bed. On anything built here before roughly the middle seventies that bed is usually mortar, poured wet over expanded metal lath, and it can run an inch to an inch and a half thick. On later work it is thinset over cement backer board, which is thinner and considerably lighter. Below whichever of those you have sits the deck: a sheet good, three quarter inch plywood on a decent build and particleboard on a cheap one, screwed or nailed down to the tops of the cabinet rails.
That deck is the structural element. It carries the tile, it carries the sink, and one day it is going to carry a stone slab. It is also the layer that has spent twenty or thirty years quietly getting wet.
Grout Is Porous and Caulk Has a Lifespan
Two ordinary facts explain almost every rotten deck we find.
The first is that cementitious grout absorbs water. It is meant to. Sealing slows it down and nobody reseals kitchen grout on a schedule, so after a decade the grout lines around a sink are a wick rather than a barrier.
The second is that the caulk bead where a drop in sink rim meets the tile is a consumable. It is silicone or acrylic, it lives in hot water and detergent, it gets scrubbed, and it fails somewhere between five and ten years in. When it fails it does not announce itself. It opens a hairline gap under the sink rim, right at the point where the deck has a raw cut edge with no face veneer on it and nothing but bare end grain facing the water.
Plywood drinks through a cut edge far faster than through its face. Particleboard does worse than that, swelling irreversibly and turning to something with the structural qualities of damp cereal. And because all of this is happening under tile that still looks immaculate, the first anyone knows about it is the day we take the tile off.
What We Find on the Day
There is a fairly predictable range.
Best case, and it does happen, the deck is dry, the plywood rings solid under a knuckle, and the only work is pulling fasteners and setting a new sheet. Perhaps a quarter of the tear outs we do land here, usually where somebody kept the caulk bead fresh or the kitchen was redone in the last fifteen years.
The common case is localised damage at the sink bay. Delamination for six to eighteen inches out from the cutout, dark staining, the top ply separating when you get a bar under it. Everything else in the run is sound. This is a straightforward repair: cut back to solid material, replace the deck across that bay, check the rails underneath.
The bad case is when the water got past the deck and into the cabinet. Then you are looking at a soft top rail, a sink base floor that has been wet more than once, and occasionally a stile that has gone at the bottom. Cabinet carpentry is a different conversation from countertop work, and if the boxes are far enough gone we will say plainly that new stone on top of them is throwing good money after bad.
The rarer finds are the ones that make the job interesting. Rodent nesting in a dead space behind a corner cabinet, because the dead space beside a lazy susan is an ideal place to be if you are a rat and the crawl route came in from a gap around the water line. Old repairs done in the wrong material, layers of vinyl or a previous laminate top left in place and simply tiled over, and once in a while a deck that turns out to be two decks, the second one glued onto the first by somebody who did not want to deal with removing it either.
The Question About Older Houses
If your house predates 1980, there is a materials question worth taking seriously and we will not pretend otherwise.
Some adhesives, skim coats and sheet products from that era contain asbestos. Countertop assemblies are a less common location for it than flooring, but the mastic under an old tile counter and any cutback adhesive sitting on the deck are legitimate candidates. We do not test, we do not have the qualifications to clear it, and any countertop shop that glances at a kitchen and tells you it is fine is guessing.
The honest advice is that a lab sample through a testing outfit here in the Inland Empire is cheap and turns around in a few days. On a Wood Streets bungalow or anything of that vintage on the older stretches near Victoria Avenue, do it before demolition is booked. It costs very little and it removes the one genuine health question in the entire project.
Riverside Specifics That Change the Answer
Two local conditions come up repeatedly.
The first is the heat, and the way it interacts with what you choose to put back. Riverside summers are long, dry and hard on west elevations, and a kitchen window facing that afternoon sun delivers years of concentrated ultraviolet onto whatever is under it. Engineered quartz is stone aggregate in a resin binder, and resin is a polymer that can shift tone under that kind of exposure, pale colours first. Granite is unaffected. That is not a reason to avoid quartz, it is a reason to think about where the run actually sits before choosing.
The second is slab on grade construction, which most tract housing in Orangecrest, Mission Grove, Canyon Crest and Arlington sits on. Slabs move a little over the decades, and the cabinets bolted to them move with the floor. Grout lines and a thick mortar bed hid whatever settlement happened. A flat stone slab will not hide it, which is why we level the run and shim the boxes after demolition rather than assuming the old counter plane was true.
How We Price Around the Uncertainty
The only fair way to quote a tile tear out is to refuse to pretend we know what is underneath.
So a quote from us has three parts. The tear out and haul away, which is a firm figure because it does not depend on what we find. The slab, templated, fabricated and installed, which is priced per square foot once you have chosen a material. And a stated range for deck repair, with a condition written next to it: this applies only to the extent that the deck is actually damaged, priced by the linear foot, and if it is dry the line comes off entirely.
That structure means nobody has to be optimistic to win the job. We are not incentivised to quote low and discover problems, and you are not being asked on day two, with the kitchen in pieces, to accept a number you never agreed to.
Before demolition we also do two small measurements that save trouble later. We record the existing counter height, because a mortar bed and tile can stand well proud of the cabinet tops and the replacement will finish lower. And we measure the dishwasher opening, because a dishwasher shimmed up to meet an old high counter needs resetting when the new top lands at a different height. Both take two minutes and both prevent an irritating discovery at reconnection.
Three Recent Ones
A nineties tract kitchen off Alessandro Boulevard, tile over backer board. Deck bone dry everywhere except a nine inch crescent at the front of the sink cutout. Cut back, patched, new sheet over the bay, done inside a morning. The repair allowance on that quote was mostly refunded.
A house on the older side of Victoria Avenue, mortar bed over lath, and about three hundred pounds of it. Deck gone across the entire sink bay and the top rail of the sink base soft enough to take a screwdriver by hand. That one needed a day of carpentry before templating and the owner knew the figure on the afternoon of the demolition, with photographs, not at the end.
A small L shaped kitchen in Arlington where the tile was sound and the owner simply disliked it. Deck was perfect. We found a granite remnant at a yard in Colton that covered the whole run, and the finished job came in under what a full slab would have cost by a wide margin.
What to Do Before You Call Anyone
Open the sink base and look up at the underside of the deck with a torch. Press it with your thumb around the cutout. Look for dark staining, for a spongy feel, for rusted fastener heads, and for a swollen edge. Then check the caulk line at the sink rim from above and see whether it is still bonded on both sides or has parted from the tile.
Five minutes of that tells you more about your countertop project than any brochure will. And whatever you find, mention it when you ring, because it changes what we bring to the first visit.
Call (951) 702-1038.
What We Do Once the Tile Is Off
The demolition, the carpentry underneath it, and the slab that goes on top.
- 01Tile Counter and Backsplash Removal
- Tile, bed and backsplash out, cabinets protected, debris hauled. Backsplash tile bonded straight to drywall pulls the paper face with it, so we quote the wall patching in rather than discovering it on the day.
- 02Deck Inspection and Rebuild
- The old deck comes off and the cabinet tops get looked at properly. Soft plywood, swollen particleboard and rotted rails get replaced in new material before anything stone goes near them.
- 03Cabinet Levelling and Shimming
- Older Riverside cabinet runs are commonly out by an eighth to a quarter of an inch. Tile and grout hid that. A stone slab will not, so the boxes get shimmed and the tops trued first.
- 04Digital Templating
- Laser template on the finished deck with the sink, faucet and cooktop present. Seam positions, overhang and edge profile are all agreed at the template, in writing, not assumed.
- 05Quartz and Natural Stone Fabrication
- Cutting, edge profiling, undermount cutouts and rodding across the sink opening. We walk the slab yard with you if you want to pick the actual piece, and remnants are worth asking about on a small L run.
- 06Installation, Sink and Plumbing Reset
- Slab set and seamed, undermount sink mounted and supported, disposal and trap reconnected, silicone at the wall. The kitchen is usable again that evening in almost every case.
Kitchens We Reach From Victoria Ave
Countertop work across Riverside and the towns either side of the 91 and 60.
- Riverside, CA (92501, 92503, 92506, 92508)
- Moreno Valley, CA
- Corona, CA
- Norco, CA
- Jurupa Valley, CA
- Redlands, CA
Call (951) 702-1038. If you already have a soft spot around the sink, say so when you ring and we will bring moisture meter and a pry bar to the first visit.
Questions About What Is Under There
- Can you tell if my deck is rotten before you remove the tile?
- Only partially, and we are honest about that. Open the sink base, look up at the underside of the deck around the cutout, and press it. Dark staining, a spongy feel or fasteners that have rusted through are all strong signs. But a deck can be sound at the sink and gone at a corner behind the range, and the only certain answer arrives when the tile does.
- Will the new counter sit at a different height?
- Usually yes, and it matters for the dishwasher. An old mortar bed with tile can be an inch and a half of build up over the cabinet. A new three quarter inch deck plus a three centimetre slab lands lower. We measure the dishwasher opening before demolition so nobody discovers it at reconnection.
- My house is from the sixties. Is there an asbestos question?
- There can be, in the adhesive or a skim under old tile, and we do not guess at it. We do not test, and no honest countertop shop should tell you it is fine on sight. A lab sample through a local testing outfit is inexpensive and takes a few days, and on a house of that age it is worth doing before anyone swings a hammer.
- Does quartz hold up in a kitchen with big west facing windows?
- Less well than people assume. The resin binder in engineered quartz can shift tone under years of direct sun, and Riverside afternoons through an unshaded west window are about as harsh as it gets inland. Granite does not care. If the window is unshaded and the run sits in it, we will say so and let you decide.
Dakotalandcommunityinsurance fabricates and installs stone and quartz countertops in Riverside, and a large share of that work starts by taking out somebody's tile. Tile counters went into tract kitchens here through the seventies, eighties and nineties by the thousand, and most of them are still in place. What is underneath them is the part of the job nobody talks about.
A tile counter is not a surface, it is an assembly. Tile on top, then either a thinset bed over cement board or an older mortar bed poured over wire lath, and under all of that a plywood or particleboard deck screwed to the cabinet rails. Every one of those layers can be sound. Every one of them can also be soft, and from the kitchen you cannot tell which.
The place it goes wrong is nearly always the same: the perimeter of the sink cutout. Grout is porous, the caulk bead at the sink rim gave up a decade ago, and water has been wicking into the cut edge of the deck the whole time. We open that area first, before pricing anything else, because it decides whether you are buying a countertop or a countertop plus a day of carpentry.
Numbers Before and After Demo Day
Two figures on every quote. What the countertop costs, and what the deck costs if it turns out to be wet. You see both before we start.
- Only if it is actually needed
- Priced per linear foot, agreed first
- Quartz or natural stone
- Template, fabrication, install
Book the Tear Out
The first visit is short. We open the sink base, check the deck from underneath, look at how the cabinets sit, and tell you what we expect to find. From that you get a countertop price and a separate deck price, so there is no moment three days in where the number changes and you are asked to trust us on it.